
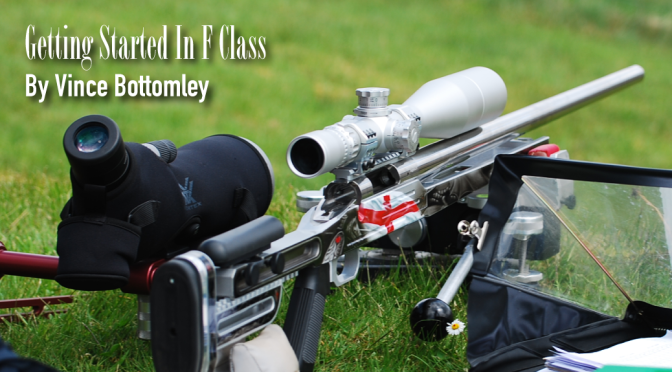
In part1, we had a look at the origins of F Class, the difference between the two classes – FTR and F Open and choosing a suitable rifle.
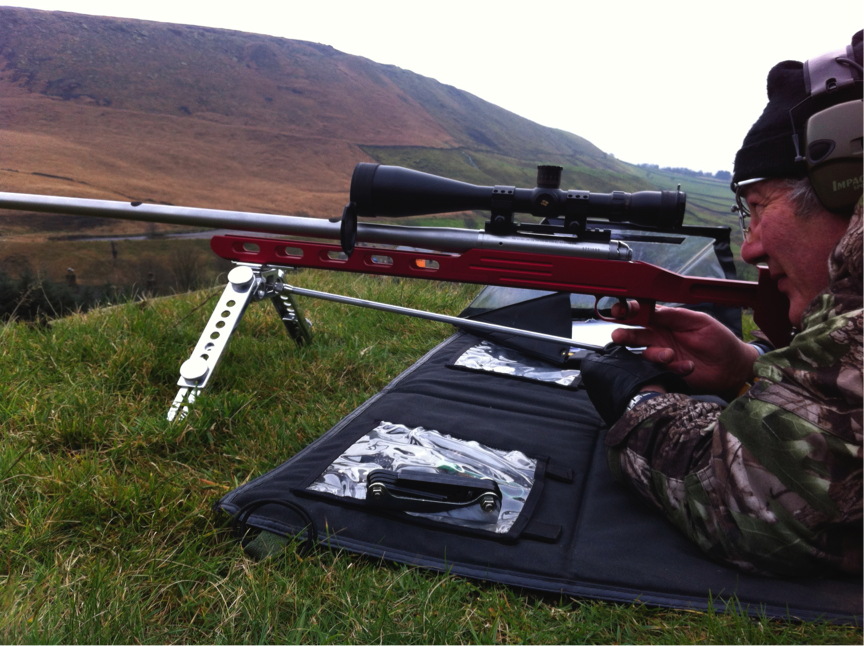
If you now have a rifle and scope, you are ready to go – almost. One other essential is a bi-pod – or front-rest (dependent on which Class you shoot) and rear bag to support the butt.
Our F Class equipment is loosely based on benchrest equipment. In fact, in the early days, F Class was dubbed ‘belly benchrest’ by some doubters. F Class is most certainly NOT benchrest on the grass, though much of the equipment is similar to that used by benchrest shooters.
F Class has been with us for a couple of decades now but FTR less so – maybe a decade. In that decade however, FTR shooters have made massive strides in bringing-on the Class so that it now occasionally rivals the Open Class scores, despite it’s restriction of cartridge and rifle support.
Whereas the Open Class shooters can take full advantage of benchrest-style ‘machine’ front rests, the FTR shooter is stuck with a simple bi-pod. Did I say ‘simple’? The famous Harris bi-pod is a great design – light, adjustable for height and very compact. However, you won’t see many FTR rifles supported by a Harris.
So what’s wrong with a Harris? Probably most of us have used one at some time or other and it is possible to shoot damn well off a Harris but, it does have its limitations. Even when fully extended, the Harris ‘footprint’ is quite narrow and thus not good at resisting the torque of a 18lb FTR rifle kicking out heavy bullets from a 1 in 10 twist.
OK, so we need a bi-pod with a wider footprint. We don’t need a folding bi-pod though and, if we are to allow the rifle to recoil a little, skids – or skis – of some sort may be preferable to rubber feet. Rubber feet don’t work too well on soft grass firing-points and even worse on hard surfaces where there is a tendency to bounce.
Here are a few attempts to address some of the Harris’s issues.
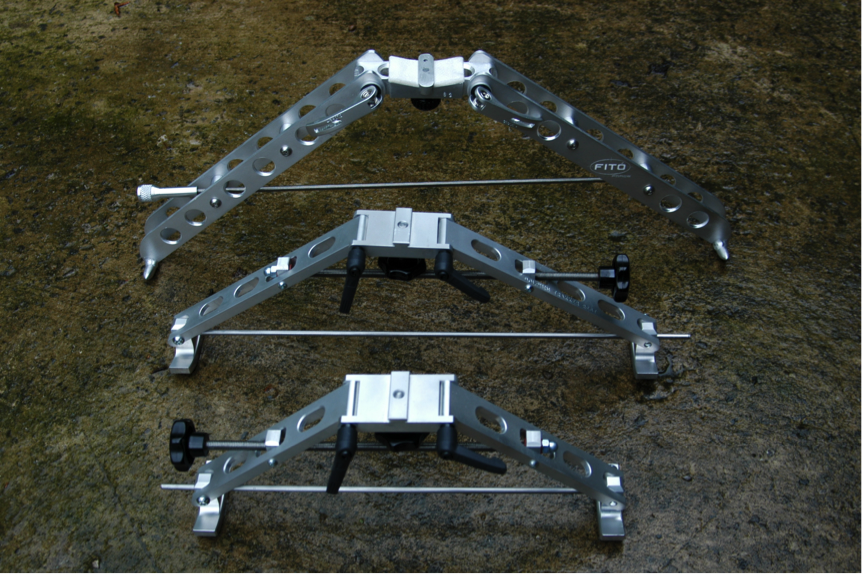
All the above bi-pods have great skids – or skis. They all offer a wider footprint than the Harris. They are easier to raise or lower than the Harris and they can all be adjusted for cant but, unlike the Harris, when you need to raise the rifle (shooting uphill) the footprint gets narrower – in the case of that neat little bi-pod at the front, the feet would be only inches apart – hardly stable. The larger bi-pod at the rear will still offer a reasonably wide stable footprint but at the expense of greater weight.
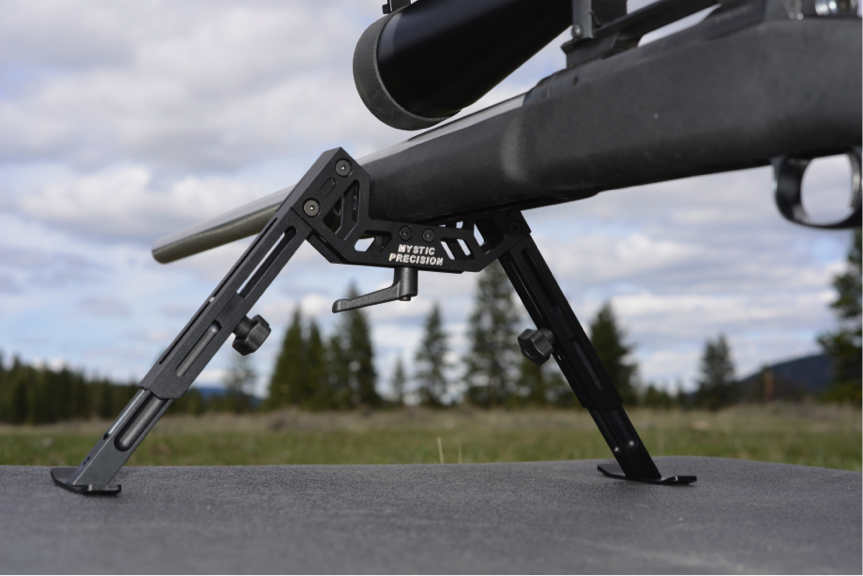
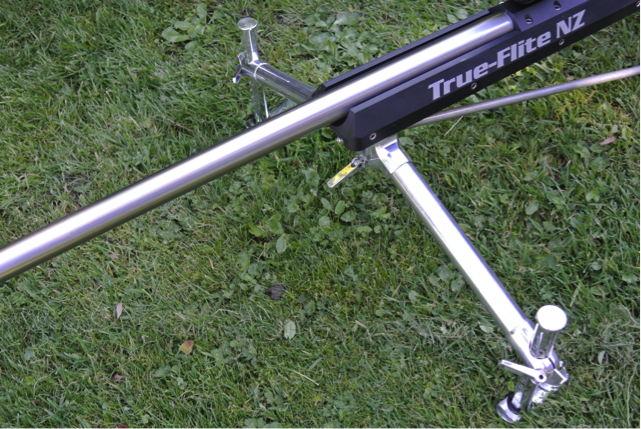
Here’s a bi- pod that attempts to address a few issues.
This is the Mystic Precision from Canada. It weighs about the same as a Harris – i.e well under a pound. As it gets higher the footprint gets wider. It has decent skids and the rifle sort of sits in it rather than on top of it. If it has a downside, it’s not too easy to adjust from the prone position and it has no cant facility – useful as bi-pods can have a tendency to ‘dig in’ over the course of a shoot, often canting the rifle a little.
Here’s one of the most advanced bi-pods on the market, made by Evo Leisure in the UK. It’s modeled on the Canadian Remple bi-pod – probably the finest bi-pod ever but the Remple is far too heavy for most FTR rifles.
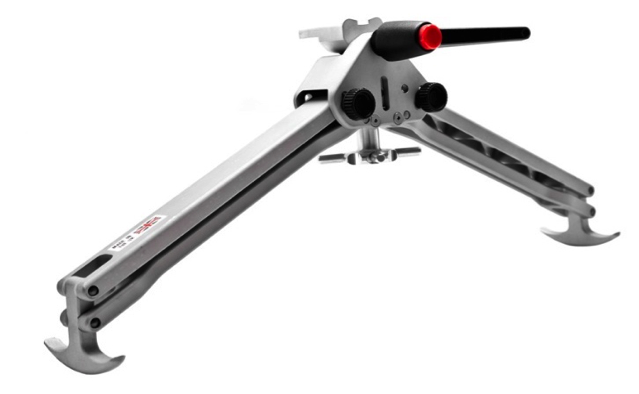
The Evo bi-pod is perhaps the nicest of all bi-pods to use. It can be adjusted easily from the prone position – thanks to the mariner-wheel, plus it has great skis and, although it’s twice the weight of the Mystic Precision, it’s not too heavy for a competitive FTR rifle. Again, it suffers from footprint-width and the rifle is perched on top of it – increasing the tendency to cant under recoil but the front lever allows easy cant adjustment
Now here’s a novel approach to solving all our issues – the Flex Bipod – designed by an American FTR shooter.
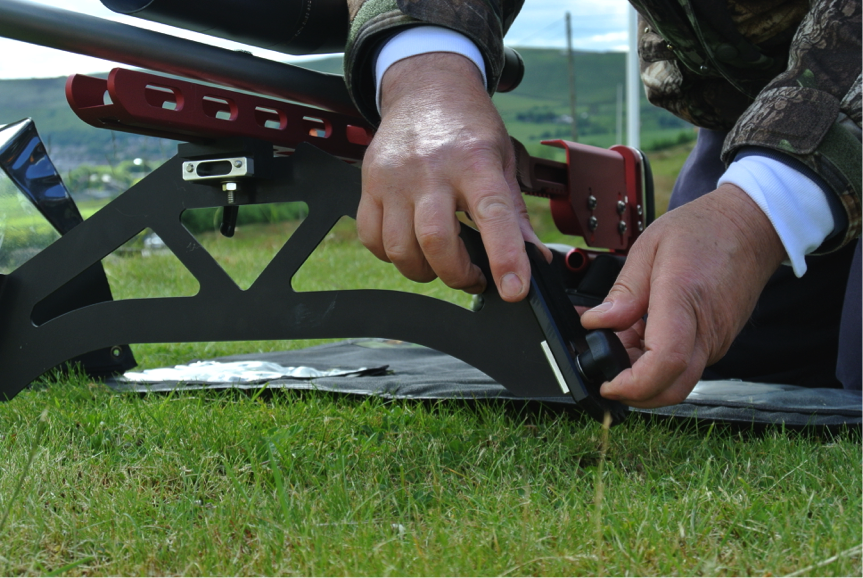
This bi-pod offers a wide ‘fixed’ footprint and the height is adjusted with the skis – except the skis aren’t skis – they are designed to dig into the ground, allowing the whole ‘pod to flex under recoil. It’s light and it can be adjusted for cant as well. It really works but it looks a little bit weird and elicits sarcastic comments from fellow shooters – you need a thick skin if you shoot off a Flex-pod!
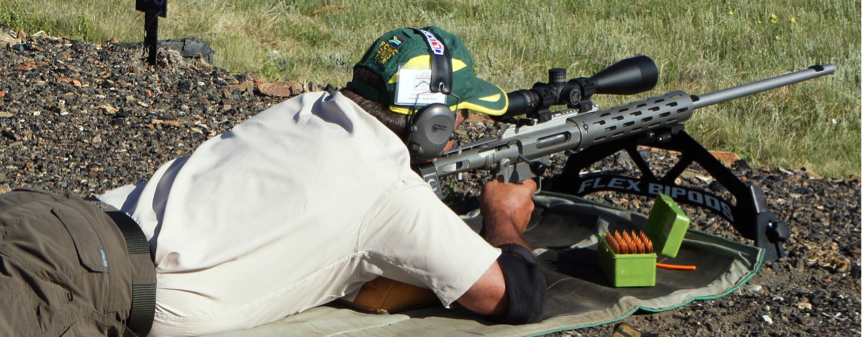
Here’s an Aussie shooter using the Flex Bipod at the F Class Worlds in Raton USA 2013. Note the surface of the firing-point – not really ski-friendly so the Flex-pod is maybe a good choice!
I’ve shot off most of the bi-pods here – including the Flex-pod. I can confirm that the Flex-pod works well – I held very good elevation, always the sign of a good set-up.
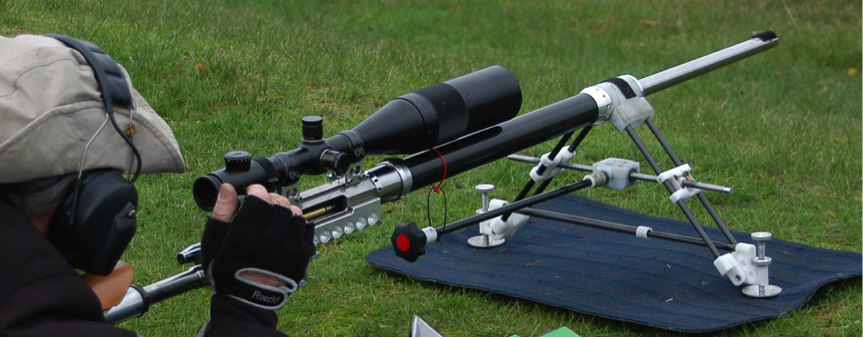
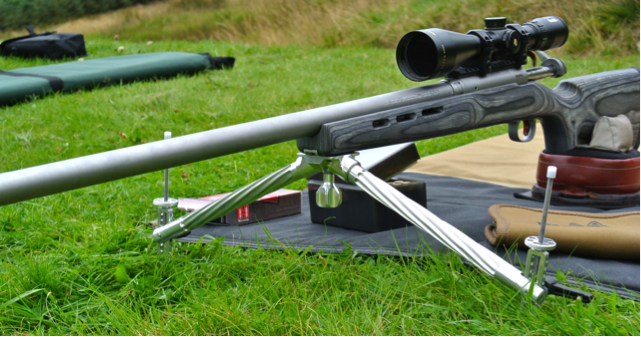
Of course, the search for the ultimate bi-pod is not lost on FTR shooters – who can be a creative lot. Look at this home-made effort – with a gearbox allowing height adjustment from the prone position. Whilst you’re at it, have a look at the rest of the rifle!
So, have we really improved that much over the Buffalo hunter’s crossed-sticks from 150 years ago? Light, wide footprint, quickly adjustable and cheap!
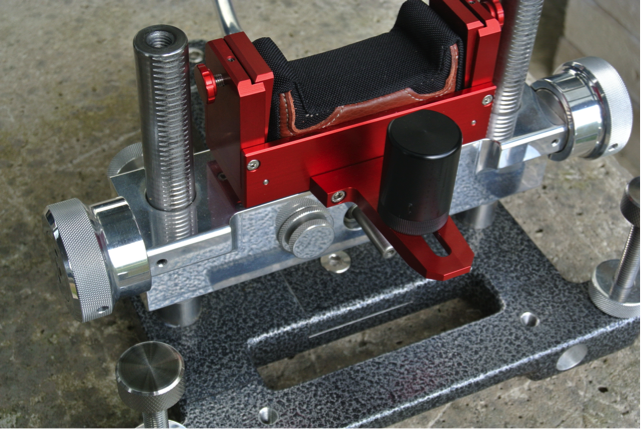
Many of you will be familiar with the name Sebastian Lambang. Seb is an Indonesian shooter – though perhaps more drawn to benchrest than F Class. Seb is also a brilliant engineer and innovator. His NEO joystick front-rests are probably used by more F Class and benchrest shooters than any other rest – if you can get hold of one, for there is always a waiting list.
It was almost inevitable that Seb would turn his attention to the bi-pod – but we knew it wouldn’t be simple – but it would be shiny! His first effort addressed many of our issues, with a wide footprint – which got wider as you raised it and the joystick meant that it was easily adjustable from the prone position. On the downside, it was just a little bit too heavy and it didn’t need to fold. Laurie Holland served as test pilot for the prototype – see pic below.
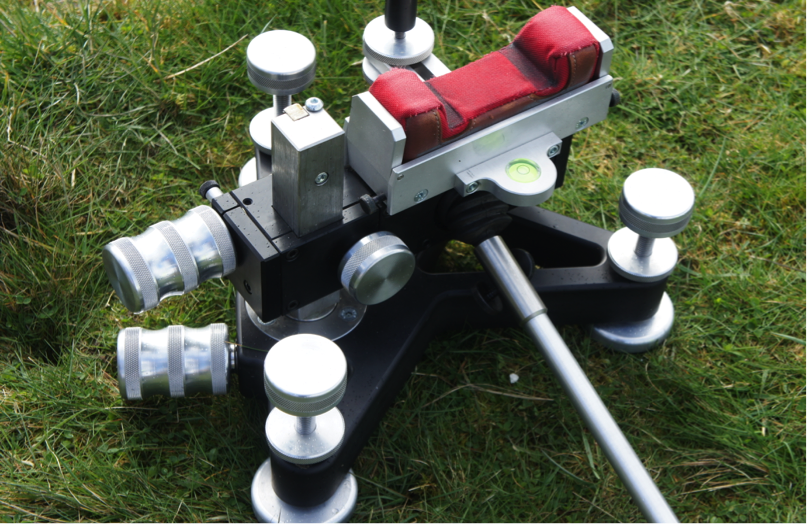
Seb listened. Then went away and came back with another prototype – the Joypod. The Joypod is certainly a joy to behold and it pretty well ticks all of the boxes:
- It’s light – very light – at just 16 ounces
- It offers a very wide stable footprint – 20 inches (50 mm) – which remains constant
- Easy to set-up, good range of height adjustment (4.5in./115mm) and easy cant adjustment
- The joystick system offers quick and accurate fine-tuning of the aimpoint from the shooting position, QD fit on an Anschutz-type rail or Picatinny rail if you prefer
- Looks absolutely superb and oozes quality
- It’s cheap to buy (No it’s NOT but you can’t have everything!)
OK, but what’s it like to shoot off a Joypod? Well, I shoot Open Class and even though I own a Seb NEO I can’t be bothered to haul a 20lb rest around the range so I use a home-made bi-pod. It’s light, adjustable and wide and, it works for me.
The Seb Joypod offers a similar footprint to my bi-pod, though of course I lose out a little when shooting up-hill so one point to the Joypod. I also like the Joypod’s skis – they work well on a cropped grass firing-point. The Joypod is much quicker to set up with its ratcheted sliding legs – I have to keep winding a small wheel.
I can adjust my bi-pod for cant – but it’s two clamps not one as with the Joypod. Yes, the Joypod is much lighter but that’s not a problem with my Open gun and its 22lb weight limit.
The SEB Joy-Pod. Major adjustment is made with the sliding legs which work on a ratchet system. Minor adjustments are made with the joystick.
My usual shooting method involves setting-up the rifle with the crosshairs just above the target with a soft back-bag under the butt, then squeezing the back-bag to fine-adjust elevation. This method is quick and I’m used to it as a benchrest shooter. The Joypod takes a different technique.
Set up using a benchrest-style bunny-ears back-bag under the butt, so that the crosshairs are just below the target and the joystick is fully depressed. The Joypod is spring-loaded to part-support the weight of the rifle so that the joystick requires little effort to move it.
Inevitably, with either of the above methods, the rifle settles during the course of the shoot and further adjustments need to be made. I can usually cope with this by giving the back-bag an extra squeeze, rather than adjusting my bi-pod – which is a pain as the clamps must be slackened and the adjuster wheel turned and then re-clamped – a bit of a stretch from the prone position.
The joystick doesn’t offer a massive range of adjustment on the target and halfway through the shoot, I ran out and needed to adjust the main legs a notch – which, in all fairness, was much easier than adjusting my own bi-pod.
The Joypod rides very well under recoil – especially on the Astroturf on Diggle’s firing-point. If the firing-point surface is not so good, Seb includes his own bag which is a well thought-out affair with four compartments which can be filled with sand. The bag conforms well to uneven firing-points and allows the rifle to recoil as it should.
So, the big question – do you need a Joypod? Will you shoot better with a Joypod? At £350 the Joypod is not cheap – in fact it’s probably the most expensive bi-pod you can buy. If it were £150 I suspect that most FTR shooters would be using one. Try one if you can but don’t expect to love it first time out. Have a quiet session, get used to setting it up and adjust the joystick tension – or stiffness – to your liking. If you do buy one, I think you’ll get to like it. Certainly, I won’t be going back to my old bi-pod.
If some of the features of a Joypod appeal – like the fixed width, light weight, individually adjustable legs – you might like this Italian-take on an FTR bi-pod. It’s quite similar-dlooking to a Seb but without the joystick. Actually, I quite like it as it allows me to bag-squeeze. March Scopes UK are the importers and the cost is likely to be around £250.
If you choose to shoot Open Class, you can ignore all this bi-pod stuff – just make sure you’re fit enough to carry half a hundred-weight of front-rest, back-bag, rifle etc!
Don’t forget, you can shoot off a bi-pod if you wish – I do and I don’t really feel that disadvantaged but I only shoot a piddling 6mm. If you do want a machine-type front-rest there are a few choices.
Initially, shooters started off with the benchresters’ old tripod-type rests but these quickly gave way to the ‘joystick’ rest. The advantage of the joystick rest is the ability to easily and quickly adjust your aim from the prone position. If you use a tripod rest you’ll find yourself stretching to reach the adjustments and end up shuffling the back-bag to get back on target.
Probably the ultimate F Class front rest – UK-made by Dolphin and designed by an F Class shooter
Front-rests aren’t cheap – think £700 upwards. The Seb NEO (below) is very popular but also look at the British made Dolphin and the American Farley. Incidentally, this Seb NEO has an Italian upgrade permitting the use of a one-piece Edgewood bag – a really neat upgrade from the three-piece original bag supplied with the rest.
Although all these rests are a significant initial outlay, they will literally last forever so, on that basis, they are good value and they are always highly saleable on the secondhand market. Finally, the bag on your front rest is equally as important as the rear bag. Buy a good quality one – Edgewood are amongst the best – and don’t over-fill it – if it’s too hard, the rifle may have a tendency to bounce, giving the dreaded ‘vertical’.
Next time we’ll tackle our first competition.
