The arrival of the new Norma Dasher Brass – fully formed and ready to shoot was pretty well a dream come true for me – as an existing Dasher user and surely any potential Dasher shooters. But not everyone was so delighted – check out Mick Richards’ comments on our Facebook page.
Here’s what Dasher shooter Mick has to say:
“Brass is Junk – Buyer Beware!
Longer Neck – requires special reamer and dies.
Thicker Rim – requires special shell holder, and may require an extractor modification on some rifles.
Thicker Case – reduces case capacity.
I waited months for this stuff, finally got 1000 pieces, fortunately they took it back once I found out about all of the issues and called them on it.
The fire formed Lapua case specs were great, why they had to go and change them all up makes NO freaking sense! I am back to fire forming Lapua”.
Well Mick, each to his own. Personally, I’ve got the new reamer, I’m using my existing Dasher dies without problem, I have the new shell-holder and my brass ejects better than the Lapua cases ever did, so I’m happy. But, Mick isn’t and here’s the process that he has chosen – over simply buying brass over the counter:
Step 1 – Neck-up the Lapua 6mmBR case to 6.5mm.
Step 2 – Neck-down just part of the neck to 6mm (to hold the primer firmly against the boltface).
Step 3 – Neck-turn the 6mm portion of the neck. (assuming you are running a tight-neck – which most Dasher shooters will do).
Step 4 – Load your cases, drive to the range and fire.
Step 5 – Check your neck-turning coincides with the ‘new’ shoulder – adjust as necessary and load again.
Step 6 – Drive to the range and fire again.
Step 7 – Trim to length – your brass is now match-ready (though some will fire a third time).
Now that’s an awful lot of trouble – not to mention bullets, powder, primers, barrel-life and time! Are these ‘off the shelf’ Dasher cases beginning to look just a little bit attractive?
The first two steps of the seven stages listed above – i.e. creating the false shoulder – is necessary to hold the base of the cartridge-case (and thus the primer) hard against the bolt-face. If you don’t do this, the firing-pin will simply push the case forward (into the longer Dasher chamber) rather than igniting the primer.
Another method is bulletless case-forming – you can use a half-full case of a fast-burning powder and a wax plug – saving bullets and barrel-life but, a final firing with a bullet is still needed to achieve a crisp shoulder.
Rather than creating a false shoulder, some shooters try and achieve the same effect by seating the bullet ‘long’ with plenty of neck-tension and jamming it into the rifling. It can work but often the bullet simply pushes back into the case, the primer doesn’t fire and you end up ‘pulling’ the bullet when you open the bolt and filling the action with powder – fire-forming session over!
There is however a third way – and this is what prompted this article – hydraulic case-forming. This process cuts out the first four steps – including a visit to the range. The case is 90% formed by hydraulic pressure – in other words, water pressure.
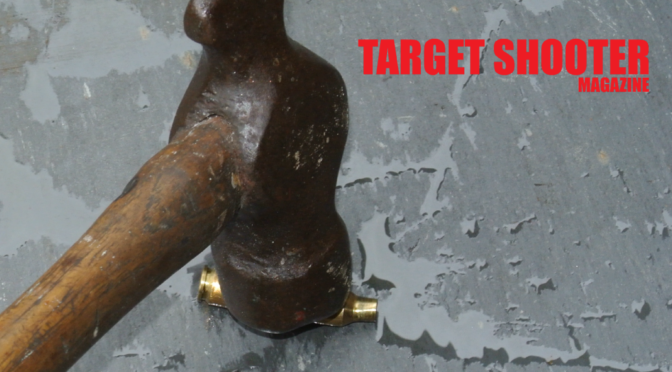
Sounds tricky? Can it work in the ‘home’ environment? Put simply, the case is filled with water, a ‘piston’ inserted in the neck and pressure applied – with a few sharp blows from a large hammer!
It sounds a bit brutal and I suppose it is but, the process has been refined by one or two companies who make the hydraulic dies. I got mine from Whidden – the guys who do the bullet-pointing dies and meplat trimmers. The purchasing process is simple – send ‘em four of your fired wildcat cases and $150 and they send you back all you need.
What’s in the box?

The beautifully finished Whidden die, the piston (a spare is included) and the blank shell-holder.
A couple of months later (I did order over Christmas) and the kit finally arrived. The hydraulic forming-die is very similar to a normal body-die but the Whidden is a work of art – beautifully finished. In place of the usual screw-in de-capper and expander-ball (that you’d have with a normal re-size die) is a close-fitting ‘piston’ assembly which screws into the top of the die. The threads are already wrapped with PTFE tape to form a perfect seal. As this assembly takes a beating – literally – Whidden thoughtfully include a spare. Nice!
The other item in the kit is a ‘blank’ shell-holder – in other words, it doesn’t have the hole in it that normally lets a de-capped primer drop through – it just acts as a bottom plug.
Here’s how it works. First, place the blank shell-holder on the press ram. Next, simply screw the die into your loading-press and set it up as you would a sizing-die – i.e. touching the shell-holder on full-bump of the press.
Now for the cartridge-case – it must be brand-new. First, insert a spent primer to seal the flash-hole, then lube the case and place it in the press and raise the ram until the case is fully inserted in the die – just as you would for re-sizing.
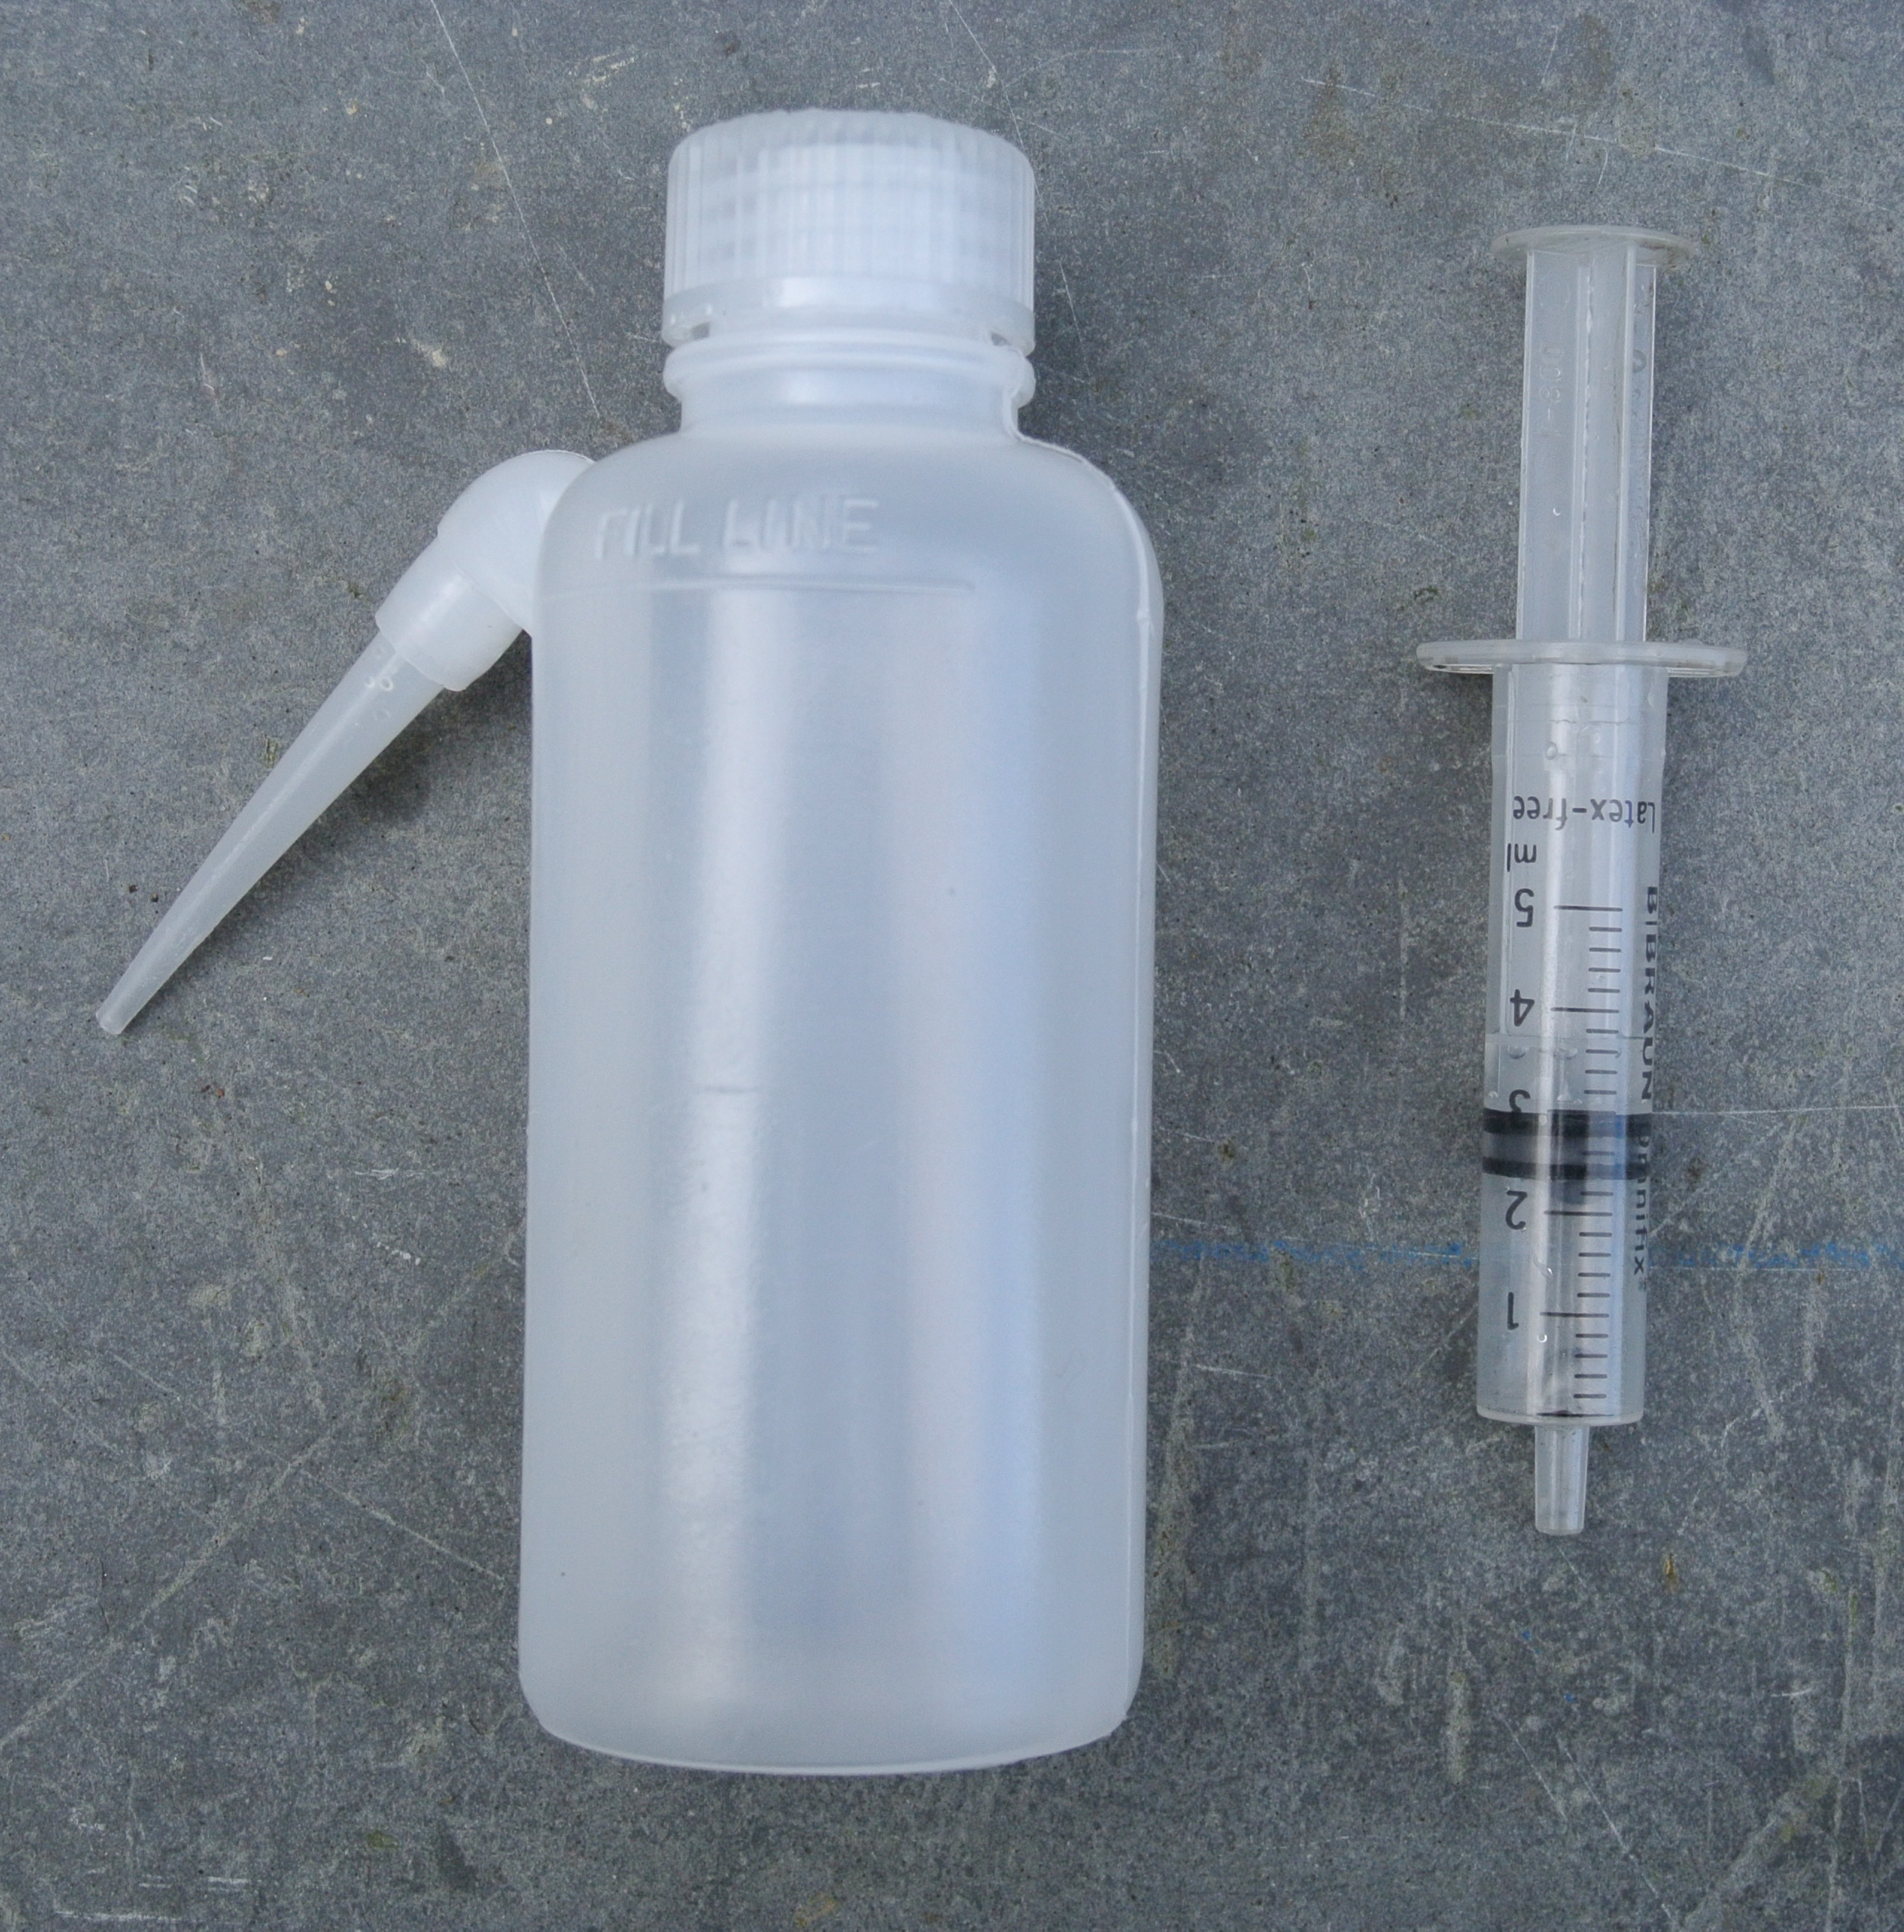
Now, fill the case/die with liquid using a small squeezy bottle – which is supplied – though I prefer the syringe. You can use water or oil or alcohol or anything that takes your fancy – water is free so I went for water. Now, slide in the plunger from the top – it will find its own level as it contacts the water/oil. Now the brutal bit – whack the plunger with a good size hammer. Whidden recommend two or three blows.
All I’m looking for is ‘base of neck’ – I know I have to fire a bullet anyway to form the shoulder properly. You are now at Step 4 on the aforementioned list. I’m running a tight-neck, so it still needs neck-turning – but, at least now I have a proper ‘base of neck’ to turn to – rather than guessing.
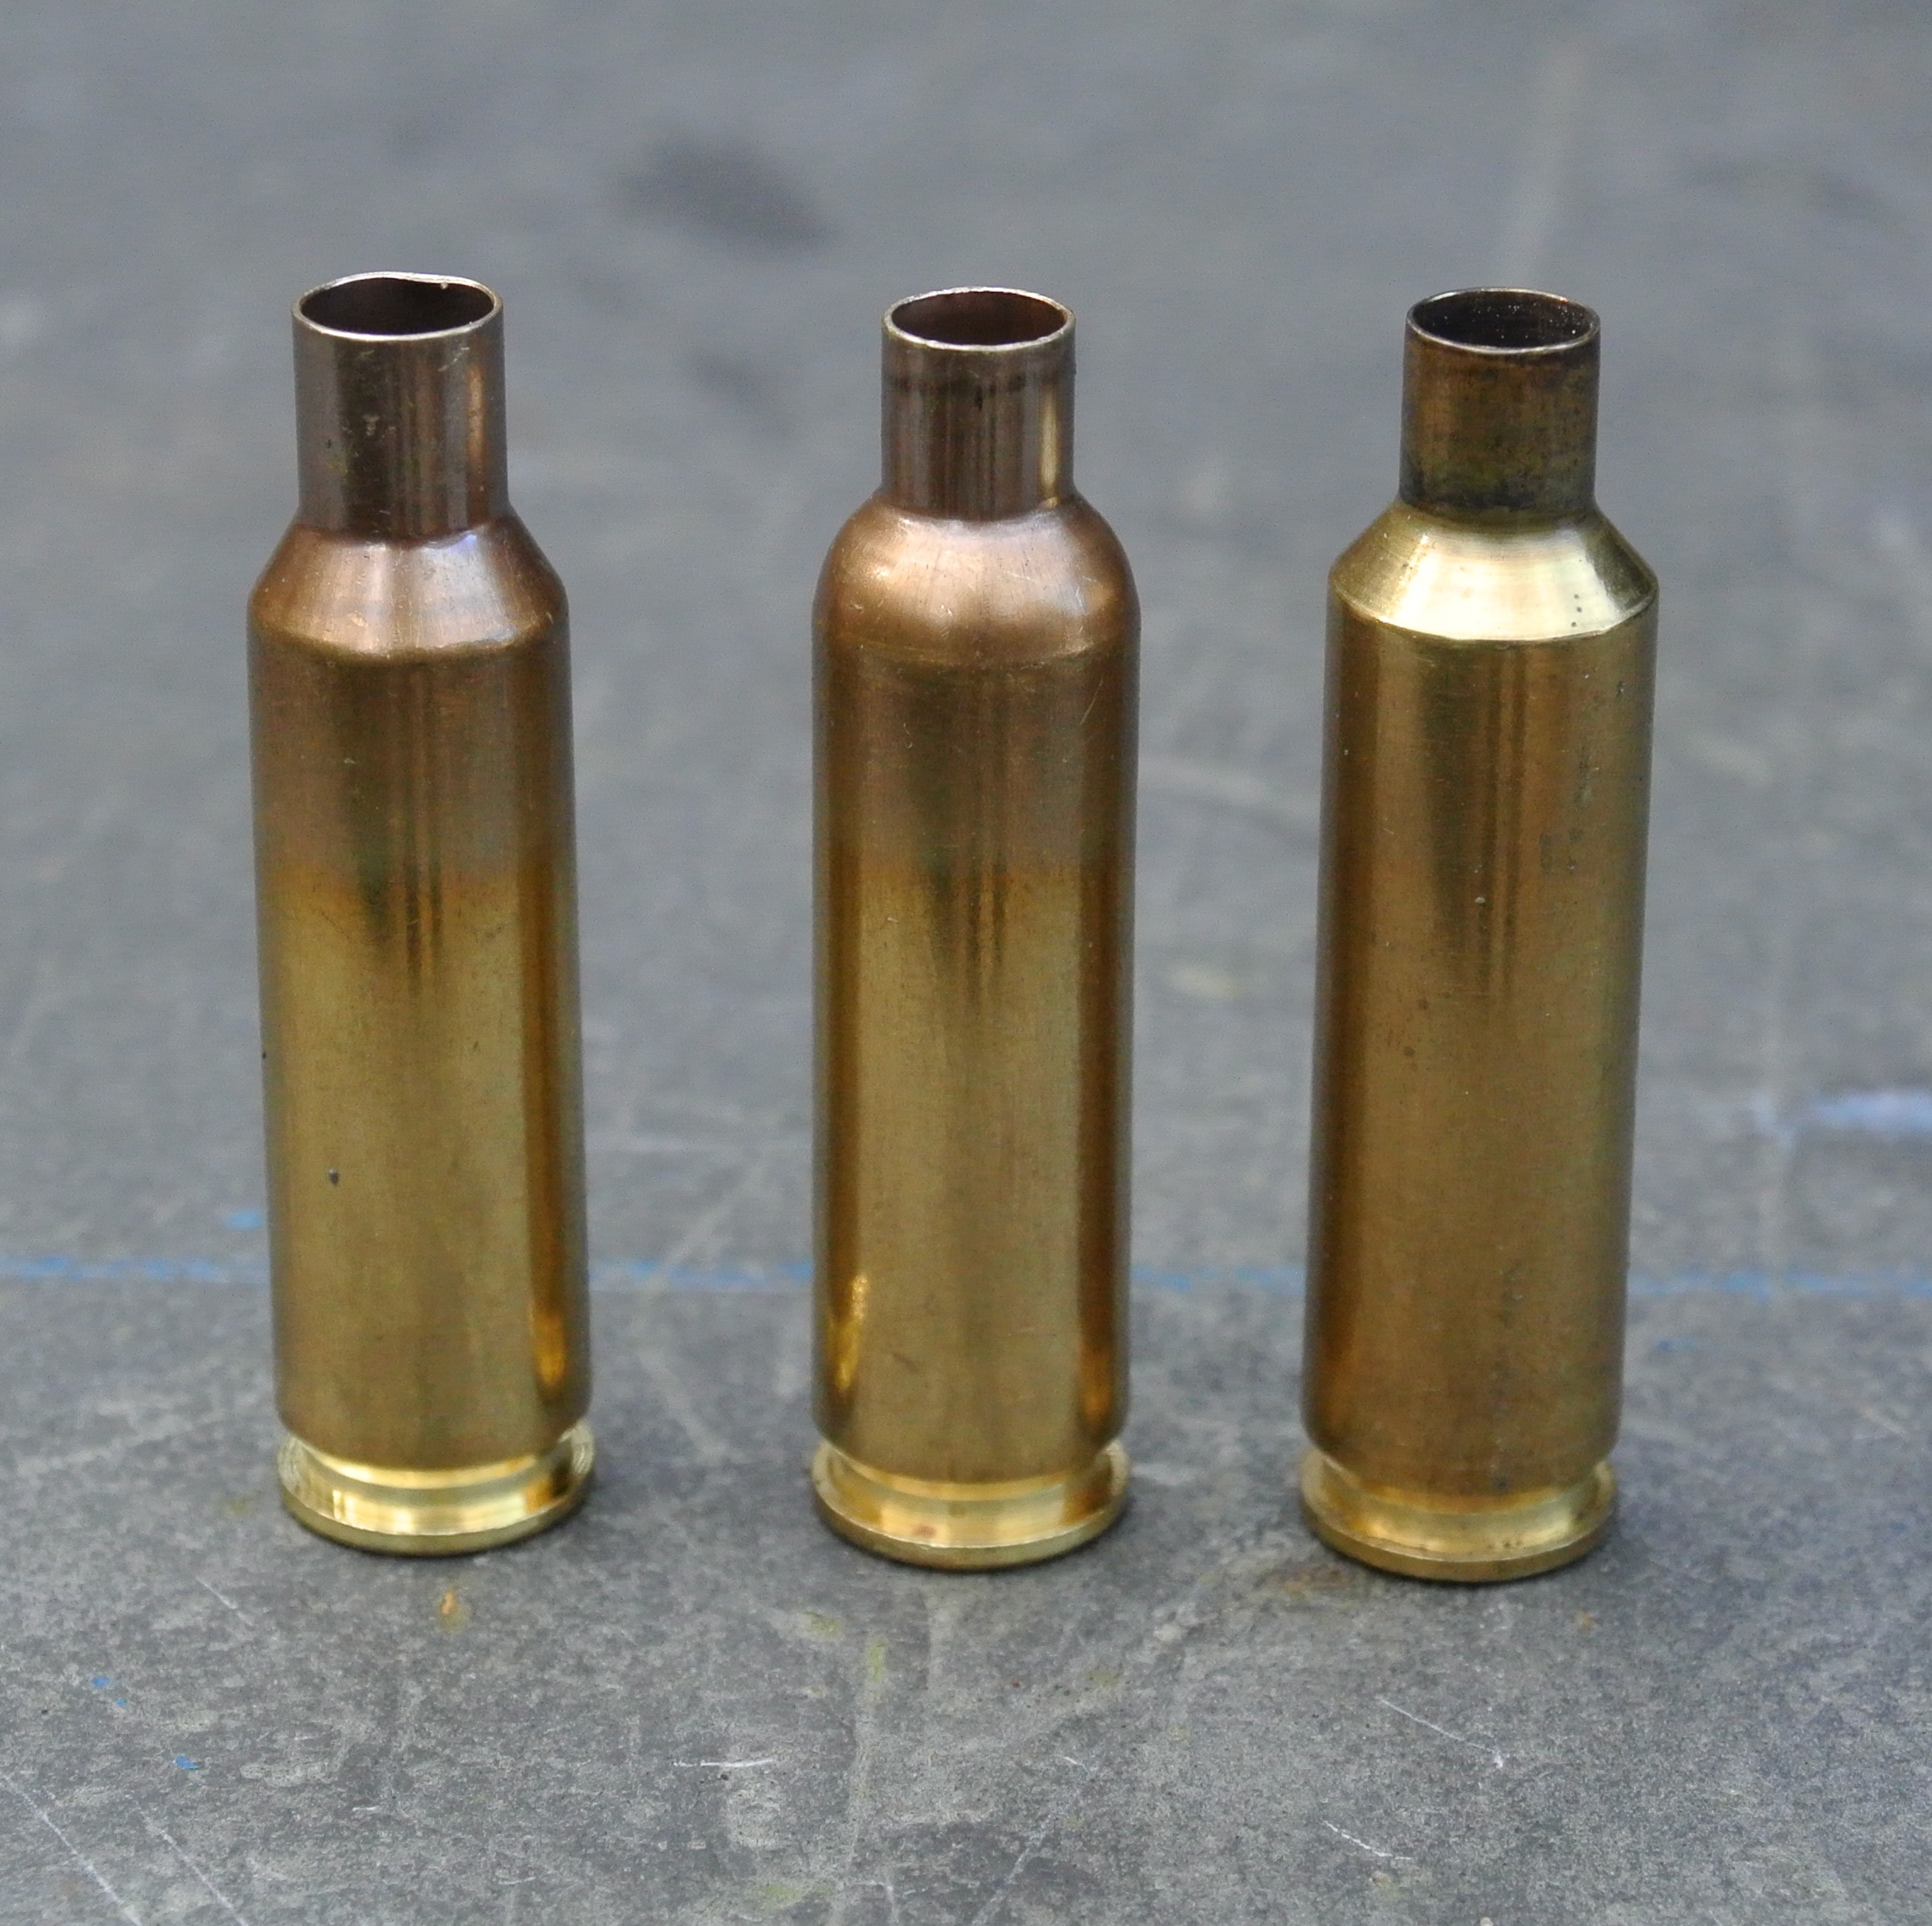
Here’s what it does – virgin 6.5×47 Lapua on the left. Centre – after hydraulically forming in the Whidden die – note that the base of the neck is clearly defined – important if you are neck turning. Right, the fully formed 6mm Smack case
Now, it just remains to load and fire with a bullet – which will ‘sharpen’ the shoulder. However, after the initial hydraulic-formed condition, cases are good enough for a bit of load development and/or running in the barrel. I actually shot mine in a 900 yard F Class comp. and didn’t really notice that much difference, – with elevation staying within a minute of angle.
Basically, we’ve saved a visit to the range, bullets, powder and barrel wear. What’s not to like? On the downside – it’s messy! Water everwhere. Fortunately I have an old press in the garage but even so I don’t want the ram to go rusty so a good dry-off and spray with WD40 is needed. From start to finish, it took me about an hour to form 50 cases – including cleaning up. However, the cases are wet and greasy from the case lube so a good wash in hot soapy water is needed but you can’t properly do this until you’ve removed the primers. Then, you need to run ‘em all through the full-length sizing-die before they are ready to shoot – so maybe a couple of hours from start to finish.
I started talking about my hydraulic case-forming efforts at a UKBRA 1000 yard BR comp. and a couple of other shooters joined in. One recommendation was to use a rubber mallet! This surprised me but it works – it bounces less than a normal hammer. The next tip – use alcohol – it’s as thin as water but won’t rust your press – still sprays all over though. Next time, I used a very thin oil – if anything, I’d say it works a little better and doesn’t splash and spray around as much as water and there is no risk of rust to your press or die. I was a little concerned about getting all the oil out of the cases but, after removing the primers, a rinse in cellulose thinners and a blast with compressed air did the trick.
When you are feeding a ‘wildcat’, brass life is always important. Owning to the work involved in case-forming, it’s tempting to put your brass through too many firings. The Whidden process is a great way of reducing the fag of case-forming – by doing much of it at home, rather than making a trip to the range and expending powder, primers, bullets and barrel-life. So anything which makes the process easier and cheaper is welcome.
However, with the advent of the Norma Dasher brass I suspect a number of Whidden hydraulic Dasher dies will be redundant! But of course, the Whidden process can be used with almost any wildcat and in fact, I actually use mine to form the 6mmSMACK – an ‘improved’ version of the 6mm Swiss Match (though I now use the 6.5×47 Lapua case owing to the small primer which takes the pressure so much better).
The case-forming process is however almost identical to the BR/Dasher in that the shoulder is pushed forward, the neck shortened and the shoulder angle steepened from 30 to 40 degrees.
Contact Widden on whiddengunworks@yahoo.com and visit the Whidden website on www.whiddengunworks.com where you can view a short video of the whole process.